
Project · June 10, 2025
Accessible Drag and Drop Storyline Interaction
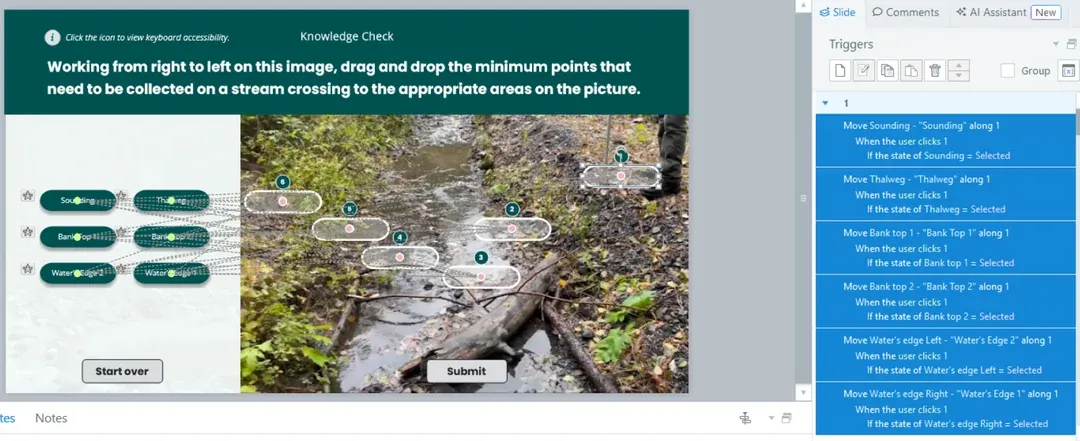
This accessible drag and drop interaction was developed in Articulate Storyline to meet WCAG 2.0 and section 508 standards, allowing learners to click and drag with a mouse or use keyboard inputs to make selections. It also includes alt text for each draggable item and each drop target so that learners with visual impairments can complete it using a screen reader.
The built-in drag and drop interactions in articulate storyline are not natively accessible so this interaction uses a freeform drag and drop slide with additional triggers to allow for a separate method of completing the interaction using the keyboard to select the item the learner would like to drag, and then selecting the location they’d like to drop.
A template of this project is available for download and may be modified to suit the needs of any project. (Rename the .zip extension to .story to edit the file if necessary.)
Credit to Art Del Rosario for his work in developing this project!
Here’s how it works:
Buttons & Motion Paths
Each drag item and drop target is a button - this is mostly important because it automatically gives all the items a “selected” state which makes this whole thing work. By selecting a given drag item, and then selecting a drop target, triggers are used to move the drag item along a motion path that leads to that specific drop target. For example, Move Item 1 along Motion Path 1 when the user clicks Drop Target 1 - IF the state of Item 1 is Selected. This is repeated for each of the drop targets with individual motion paths for each drag item. If the user clicks on Drop Target 2, Item 1 would move along Motion Path 2 leading to that Drop Target.
Select & De-select
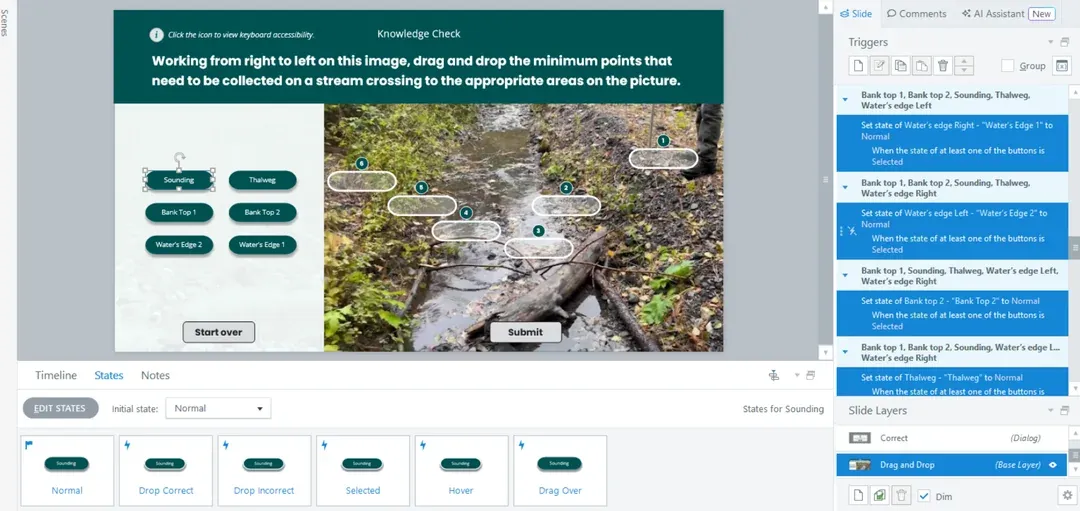
Once all the motion paths and triggers are set up correctly, it’s important that clicking on one drag item de-selects all the other drag items - so here’s where the bulk of your triggers are going to come in. When the user clicks Drag Item 1, Change the State of Drag Item 2 to Normal. This is repeated for Drag Item 3, 4, 5, 6 (or for however many drag items you end up having). This process is then repeated for EACH of the drag items. So in the example here, we had 6 drag items, so there were a total of 36 triggers that adjusted the states when selected, one to set the state of the clicked item to Selected and five more to set the states of all the other items to Normal.
Checking Answers with Variables
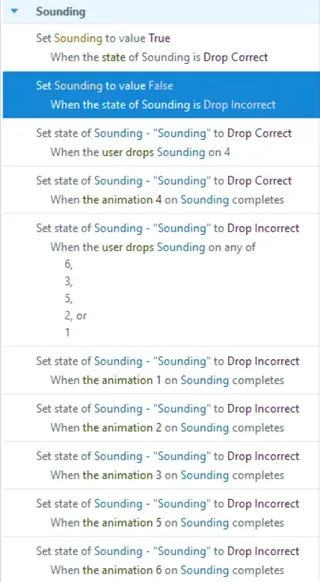
Now we need to manually check the answers which will require a variable for each drag item and setting the state to Drop Correct or Drop Incorrect. To make it easy, we created variables for each drag item with the name of the drag item (Sounding is used as an example below). We used True/False to say whether the item was correct or not (false being the default and not correct), and adjusted the variable based on the Drop Correct and Drop Incorrect states. Then we need to account for the multiple ways the user can interact with it. If they are just clicking or using the keyboard, we can use the trigger “When Animation Completes” to track whether the motion path was going to the right place or not. In this case the correct answer for Sounding was Motion Path 4, so we set the state of Sounding to Drop Correct when animation 4 completes on Sounding. For all other motion paths, we want to set it to incorrect. That handles the accessible version but since we’re using free form instead of the built-in drag and drop slide, we also needed to create triggers for when the user drops Sounding on any of the drop targets. That’s where you have Set state of Sounding to Drop Correct when the user drops Sounding on Drop Target 4. If they drop it anywhere else, it should be set to Drop Incorrect.
Resetting the Options
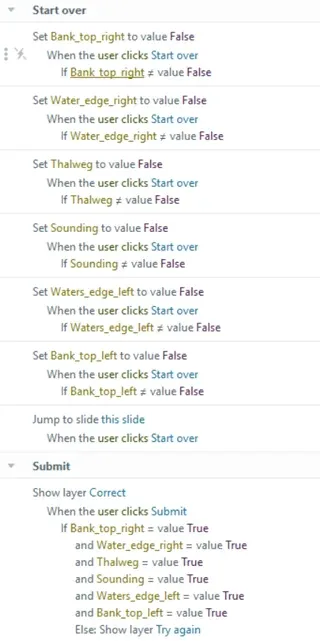
Once the items are moved, they can’t be moved back using the keyboard so we created a “Start Over” button that just reset everything. Selecting Start Over sets all the variables back to False and jumps to this slide (which is set to “Reset to Initial State” on revisiting). This effectively resets the whole thing so they can try again.
Submitting the Interaction
Finally, to submit the interaction, we added a Submit button and had it check that all of our variables are set to True, which means all of the items were dragged or moved to the right place. If they’re all True, then show the Correct Feedback layer, Else, show the Try Again feedback layer. We allowed the user 2 attempts by adding a “Drag_drop_attempt” variable that adds one every time the user visits the Try Again layer. If when the timeline starts, attempts is = 1 (it starts at 0), it automatically shows the Incorrect layer. Otherwise, it adds 1 to the attempt variable.
Alt Text
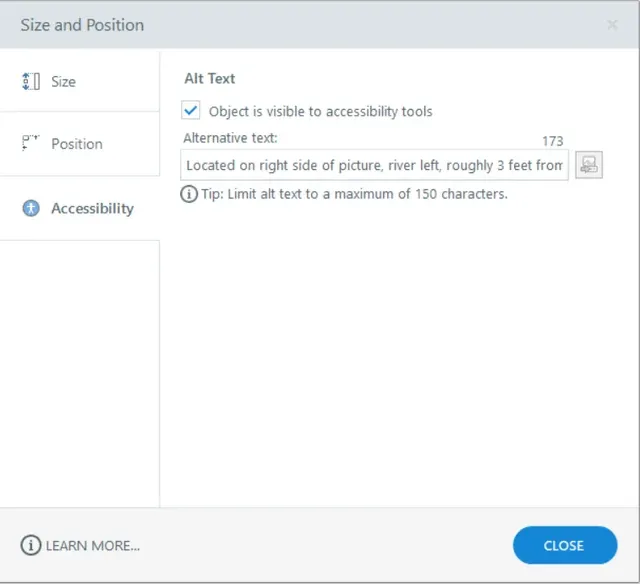
Alt text was also added to each of the drop targets, explaining in words what the gist of the location was. This was a bit tricky because you can’t just say “Sounding Correct Answer” or it defeats the purpose of the interaction so we leveraged some SME help to get meaningful descriptions of the areas that didn’t give away the answer immediately. The drag items also have alt text, but it’s just the name of the item (same for the start over and submit buttons).
Adding Instructions
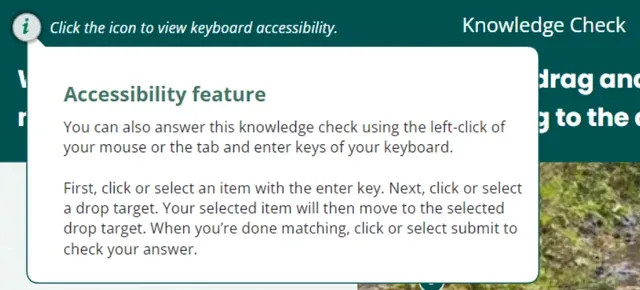
We also added a marker at the top of the focus order that describes how to navigate through the project. This is set to show all on hover so when it’s selected using a keyboard it’ll just show everything instead of having to click on it. However, it’s also out of the way enough that it won’t bother users who can use the traditional drag and drop functionality with their mouse. And that’s it! It’s a significantly larger lift than the native drag and drop slide, but we don’t take “it’s impossible” for an answer when it comes to making eLearning accessible!